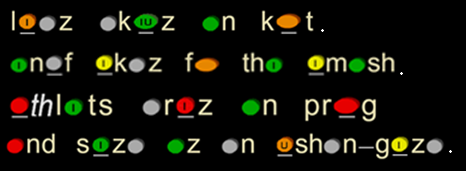
week 7

www.colorfon.com


To TRANSLATE any page, just right-click anywhere/SELECT ALL/choose your Language.


Master PRONUNCIATION through INTERACTIVE WORD GAMES.


Each lesson is offers a brief explanation and instruction VIDEO.
show more

If you haven't already discovered the Homepage,I strongly suggest experimenting

with the two games that it proposes:

they will give you a good idea about how Colorfon works, allowing you to

understand and undertake the following lessons with fluidity and confidence.

The Weekly Programme.

Consisting of five games, starting a warm-up exercise(00) that demonstrates the importance of Suffixes(word endings).

This collection is the "homebase" from which the Colorfon course operates.

The five lessons are vaguely organised from basic to more advanced,

but it's completely up to you to choose the order in which you tackle the list.

The best strategy is probably to start and complete one lesson every day

- "it's not a good idea to overload the mule, especially if the pathway is unfamiliar."

Suggestion: repeat each game as many times as you want, until you feel confident about it.

The brain assimilates information better in small doses. And sleep will re-inforce the memory.

DIALOGUES and FONCHASE.

Because of technical and time limitations, DIALOGUES and FONCHASE are competing to find a place

in the weekly timetable. The solution is to give them alternate visibility; ie 1 week on, 1 week off.

The DIALOGUES pages will only work properly on a PC or laptop.

If you only have access to a smartphone, then a possible work-around is to use

a universal digital pen to drag elements across the board, thereby compensating

for the difficulty encountered using a small screen.

All other exercises are accessible on most cell-phones,

unless your device screen is very small. However, a bigger monitor(PC or laptop) is the best media

for a comfortable and satisfying experience.

Conclusion:

By constructing English words sound by sound, you will gradually understand that speaking

a foreign language is not just the action of reading written words out-loud, but rather an art,

to be learnt and perfected like any other discipline.

Take a violin student on his first public performance - if the notes are played in tune,

it can be a beautiful experience, otherwise the audience will quietly evaporate.....


My hope is that these lessons will become part of your daily routine,

so that by the end of the course, your speech will have improved

so dramatically, that planning a future discourse in English, for business or pleasure,

will be something to look forward to, not a cause for doubt and distress.
show less


The Audio-Visual Lab:

After every lessons,you have the chance to record your own voice and compare the results with that of the teacher's(AB).

show more

About the Audio-Visual Lab:

Each interactive lesson is accompanied by a link to the Audio-Visual Lab.;

just click on the icon.

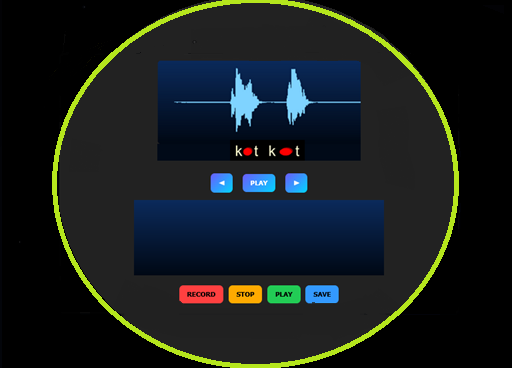
The interface represents a standard virtual audio-recording studio.

The interface is composed of two screens, each of which are used to show

one audio image(waveform) of an audio file.

Top Screen:

The top screen is occupied by the teacher's pre-recorded version of the current audio file

and cannot be modified or erased;

The audio files presented here have been composed of targeted words

that have just been constructed phonetically by the student during the last exercise;

to form coherent conversational phrases, easily assimilated and remembered.

Beneath the waveform runs a caption in ColorText of that same audio file.

There are usually 4 phrases to each audio session and they can be advanced or backtracked

by the controls underneath.

Listen to teacher's recording, then save it by using the "SAVE" button.

Decide where you want to save this file(best is to create a dedicated folder for your recordings,

being sure to name them systematically, so that you can easily reference them later).

Make it a habit to save this recording; It will be a useful element for your future collection.

Bottom Screen:

In the bottom half we have the student's screen.

After listening attentively several times to the teacher's version, you are ready to record your voice.

Press "RECORD" to start and "STOP" when finished. Begin without hesitation so that the waveform is centered inside the frame of the screen.

Speak Loudly, Slowly, and Clearly for best results.

There is no limit to the the number of attempts that can be recorded and then saved to your device.

Suggestions:

Read the ColorfonText under the teacher's version, to produce your recording as precisely as possible.

1. Best way is to close your eyes while listening and repeat several times,

concentrating on the Fon sounds as well as the accent.

2. Listen again, this time following the ColorfonText under the teacher version.

3. Now record your attempt and then, with calm, compare it with the one above.

Note:

Don't expect your attempt to mirror exactly that of the teacher at the beginning!;

with time your concentration will becomes sharper, and you will get better at producing

the sounds more accurately.

Not Perfect I have experimented extensively and found it almost immpossible to produce

a perfefect replica of the waveform even from a previous recording of my own voice.

And that is more accentuated when the recordings belong to two different people.

So my advice is to use the teacher's AUDIO FILE as your main model rather than relying

on the imprecise Wavefom, always referring back to the ColorText

for maximum precision and clarity.

Bonus:

At the foot of each weekly page I have created PNG images of all the relevant week's phrases

in Colorfon-Text for you to download to your device, which together with the saved audio files,

will become be a valid audio-visual library for you to access later,

even after the Colorfon online experience is well behind you.

show less


------------------------------------------------------


Week 7/ Lessons 31-35


SUFFIXES 07

       SUFFIXES 7:        Instr VIDEO

Instructions:

show more


Preface.

Suffixes refer to the 2 or 3 letter "patterns" that sit on the end of many common words

in the English language; an, at, er, or, ire etc are just a few. I believe that

if we can master these word endings, then we are half-way home. My intention was to include most of them; for now, the most frequently-used are covered.


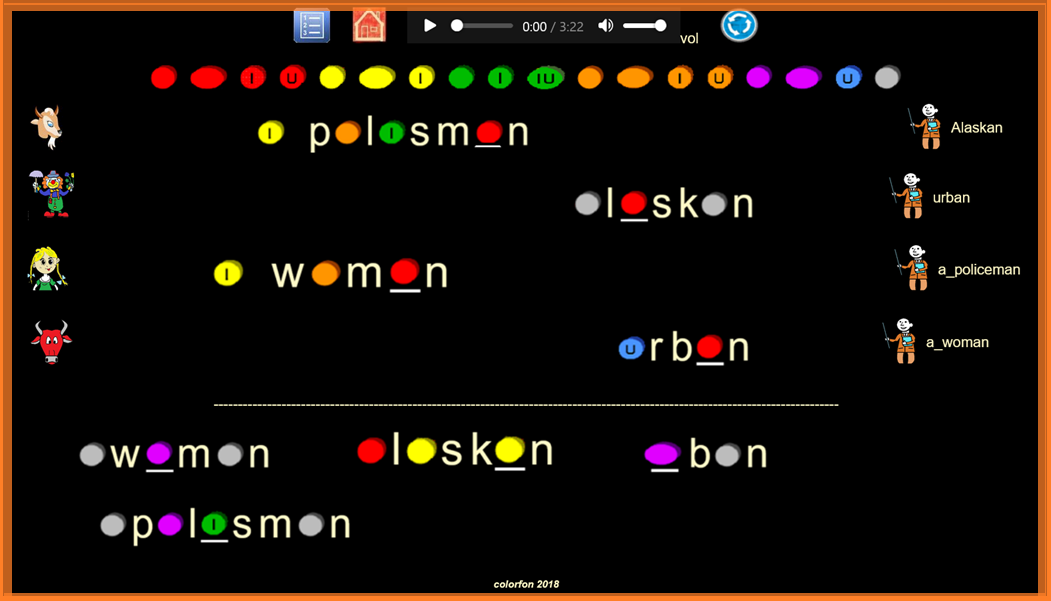
1. Heading. The 1st line contains links to this page, the HomePage and an icon to restart.

On the same line, background music can be turned on or off, with volume control.

2. Each of the coloured symbols(Fons) at the top of the page has a designated sound when clicked,

and can be used when the student has difficulty choosing the correct ColorfonText word

in the list at the bottom of the page.

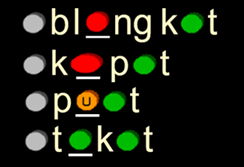
3. The cartoon images on the left of the blackboard are audio files that represent

a "bad" pronunciation of the English word (far right).

4. The image (teacher)on the right side of the page is an audio file that demonstates

the "correct" pronunciation of the same word.

5. At the bottom of the page, we have the 8 "Colorfon words" that must be dragged up

to the blackboard: 4 of them represent "bad" interpretatons and belong on the LEFT.

The other 4 represent the correct pronounciation and belong on the RIGHT.

6. After filling the blackboard, listen to the "correct" pronunciation (teacher)again,

and try pronuncing the word yourself,

concentrating on the "accented" Fon which is underlined with a white bar. Do this several times.

This may seem difficult at first, but will become gradually easier with time.

7. Learning to listen to the position of the accented Fon in each word is

a very immportant part of pronunciation training.

If your aim is to speak English well, this should become a constant habit,

and can be practiced everytime you have the opportunity to listen to spoken English.

show less

After finishing the exercise, get immediate access  to the Audio Visual Lab.


------------------------------------------------------


Lesson 31

       Game 1. VOCABULARY 7:        Instr VIDEO

Instructions:
show more


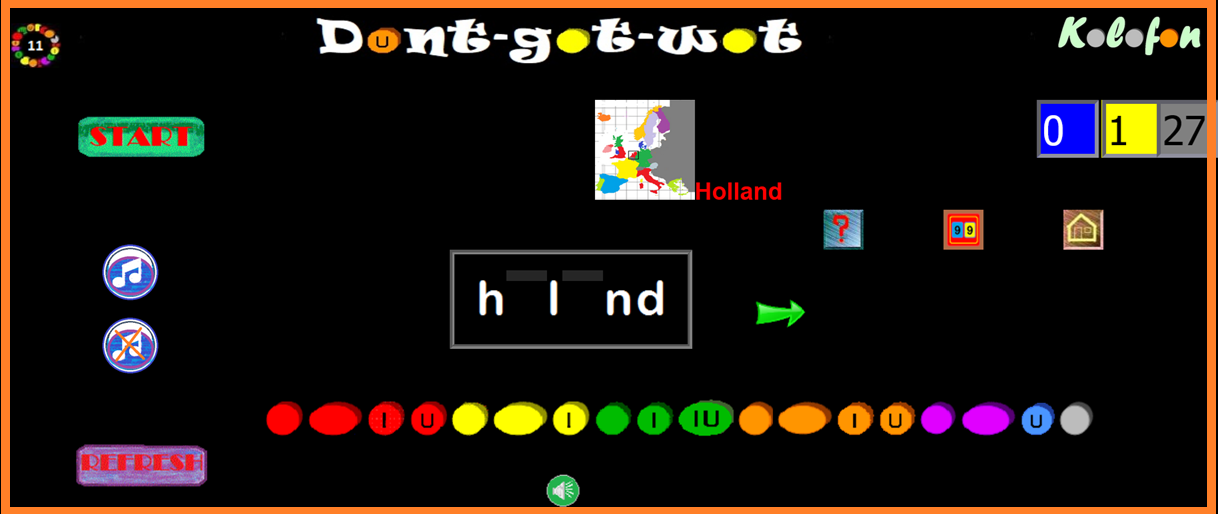
1. First listen to the audio file by clicking on the center image.

2. Decide on which Fon is correct to fill the first space:

Clicking on the green icon opposite the REFRESH button will create another bar of Fons;

These Fons allow you listen to each Fon's sound before making your choice

from the active Fon row above it.

3. When you are ready, just click your choice from the top row of Fons and the resulting Fon will appear in it's appropriate space inside the Wordbox;

4. Continue until the word is completed.

5. When the spaces are filled, take the mouse and point it to just under the Fon

which you think should be stressed/accented . Click when you are ready.

6. If you have chosen correctly, a green arrow will appear on the right.

one point will be added to your score(yellow box).

Clicking on the arrow will take you to the next page;

If not, you will take a shower, and 1 point will be detracted (black box).

This total at the end of the game will show

how many mistakes you have made and can be registered in the Progress Page.

this score will become lower with practice, showing that you are improving.

7. Finishing the last word will load a message. Click Ok to access the Progress Page.

8. Background music can be turned by the button top left.

show less

After finishing the exercise, get immediate access  to the Audio Visual Lab.


------------------------------------------------------

Lesson 32

    Game 2. DRAGONDROP 7:        Instr VIDEO

Instructions:

show more

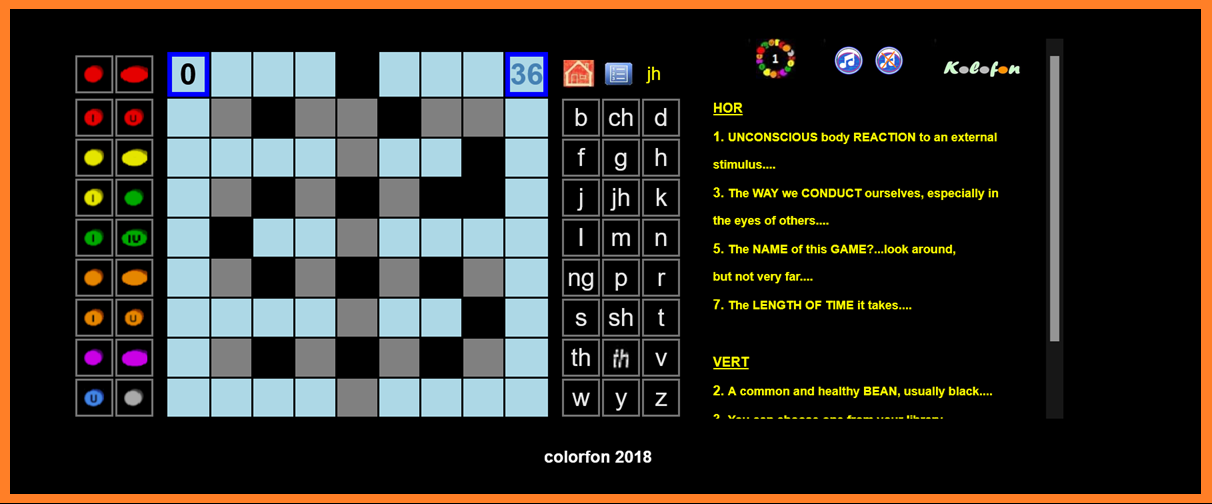
No ordinary crossword puzzle.

If you like crossword puzzles then you will probably enjoy this one.

Instead of crossing words,

Dragondrop is about crossing sounds. Maybe a little challenging at first,

but I'm sure that the more you play, the more you will enjoy it.

The Basics.

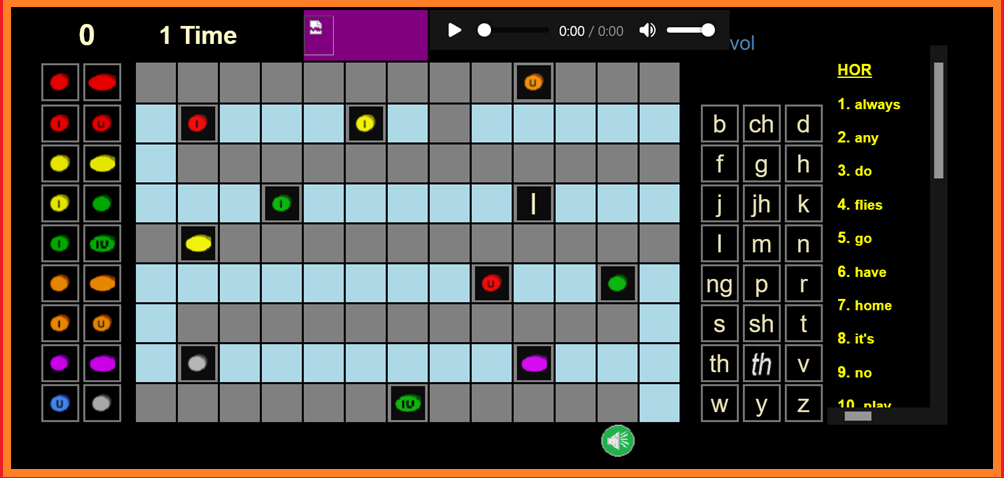
Light-blue cells are neutral - cannot be filled.

Black cells accept only Fons(coloured symbols - on the left of the grid)

Grey cells accept only Cons(consonants - to the right of the grid)

HOR = horizontal cells

VERT = vertical cells

Game starts with 0 points and ends with 36.

The solution to each clue is given as an audio file:

just click on the audio icon at the end of the clue line, and listen.

(In the Advanced Version, these audio files are absent).


Suggestions and Strategy.

1. Decide which cell you want to start from (cells 1-7)

2. Read the clue, then listen to the audio file.

3. Choose a Fon or a Con to fill the empty cell.


Fons(left table)

Click and release to hear the Fon audio file.

Click, Drag to grid and release, to fill the Grey or Black empty cells.


Cons(right table)

Click on "jh" to hear audio file for any double-letter Cons:

Click, Drag to grid and release to fill empty cells.


4. Choose your strategy: if you prefer, solve the vertical (VERT) clues first;

they have only 3 cells, so it will make it easier to fill in the horizontal(HOR) clues later.

5. Words (in clues)in CAPITOLS are attempts to use synonyms or opposites

to help with the meaning.

Fons are limited in number to just 1 more than is necessary. So be aware not to waste any.

Cons are available up to 10 for each one.

(If the horizontal clues have been resolved, then you are half-way home.)

7. Before dragging a Fon from its "home" position, look carefully at the positioning of black cells .

Listen to the audio file and try to associate each black cell on the grid

with the Fons heard in the audio file .

This will develope your listening ability and also help to avoid choosing a wrong cell.

8. Drag the Fon or Con to hover JUST ABOVE the destination cell, then release.

Hint: If you drag a Fon above a cell that is not it's destination cell, then it will cause a adjacent blue cell to blacken,

so dont release in this case. 9. You can always return the Fon you are dragging (dont release it)to it's cell of origin

if you are not sure of it's destination.

10. If you don't understand the meaning of the written clue phrase(or any other words),

you can always use your favorite app to translate it.

But it's not essential, because the important thing here is to listen to each Fon inside the clue

and then match that Fon with the relative

Fon inside the Fons table on the left of the main center grid. When you have found it,

then simply drag it to it's destination cell.

11. The task is complete when all available cells(36) have been filled.

12. On completion, the "next" button appears and clicking on it will take you to the ACCENT pages.

In the case of the REVISION version, you will be directed to the Scores Page first.

13. Examples of double-letter Cons are demonstrated in the Consonant-Page(jh) if needed.

14. You can start again at any time using your browser REFRESH button.

show less

After finishing the exercise, get immediate access  to the Audio Visual Lab.


------------------------------------------------------

Lesson 33-ON

       Game 3. DIALOGUES 4:        Instr VIDEO

Instructions:
show more


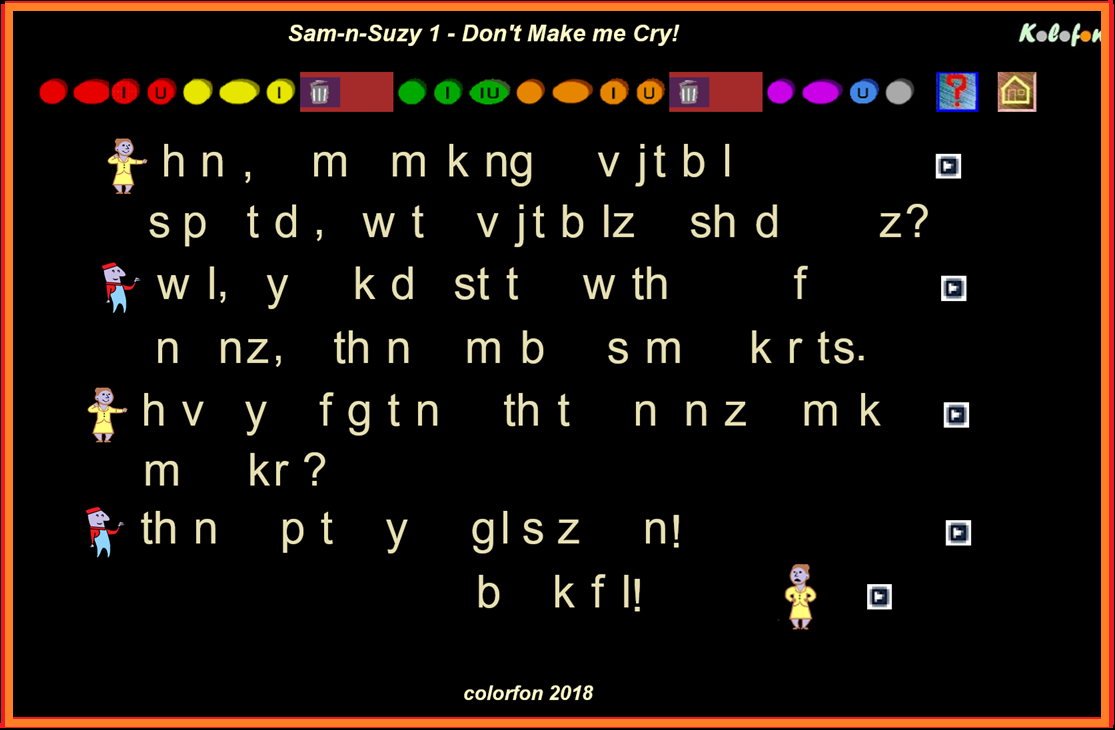
Funny conversations between a happy couple - Sam 'n Suzy - you have to laugh!

In the meantime, you can try and construct their actual sentences.

Instructions:

1. First, click on the 1st character (on the left side) to open the 1st audio

and listen carefully. If you find it too fast, then there is a slower version at the end of the line.

This applies only to the 1st DIALOGUE:

the next pages will have only one Audio file with both versions .

2. When you have listened several times, you can begin to choose the correct Fon

from the menu above to fill in the empty spaces on the center board.

3. Just drag and drop the chosen Fons as you did

in DRAONDROP. The empty spaces are often very

short so you have to choose carefully when dropping the Fon in its place...

the target cell will light-upon approching it, so will help you to achieve this.

4. Listen carefully to the audio file again, then try to repeat the phrase as accurately as possible.

When you are happy with the outcome,go to the next line and repeat the process.

5. To listen to the sound of any Fon, just go to top of page and place the cursor on the Fon + CLIC.

6. Any unwanted objects can be discarded by dropping on to one of the two trash cans.

7. Best results are obtained by choosing "view/full screen" from the main menu in your browser.

You can also use ctrl on keyboard + scroll button on your mouse to zoom in and out.

Smartphones are best used in panorama mode.

show less

After finishing the exercise, get immediate access  to the Audio Visual Lab.


------------------------------------------------------

Lesson 33-OFF

       Game 4. FONCHASE X:        Instr VIDEO

Instructions:
show more


Short sentences with a shared theme - the same theme-word appears in every line.

Another grid board game but demands more of your cognitive ability....

Short sentences with a shared theme - the same theme word appears in every line.

Choose your words from the list on the right - and you have to use them all!

This is more of a "brainer" than a source of vocab, but it's full of useful phrases.

Instructions:

1. Create the vertical words first.

You should be able, after the previous exercises, to recognise and "voice" the Fons

contained in the vertical cells of the grid, almost always 3 elements.

2. If you find this difficult, just click on the Fon, usually in the center, to hear it’s sound.

3. Now go to the bottom of the list on the right of the short words, and find the word that

Contains the Fon that you just heard.

4 Next go to the Con menu and choose the correct Cons that you need to complete your

three-element vertical word. Do the same for all the other vertical words.

5. Now start to fill in the horizontal cells.

6. Starting at the top left, begin by looking at the beginning of each line of grey cells.

7. Compare this with the clues in the word list, and search until you find a match in the grid,

one cell at a time . For example, if there is a “g” at the beginning of the line,

look for a word that begins with a ”g” in the right word menu.

(It may be in 2nd or 3rd place, or at the end – you have to seek and find).

There may be more than one. Try experimenting to see if it fits on the grid

with the existing cells that have been already filled.

If that doesn't work, try another. If you are not sure, then leave it as a temporary solution

and come back later to correct it, if necessary.

8. In the meantime, continue down the grid until you have filled as many cells as is possible

with the information that you have.

9. Go back to the beginning and follow the same procedure until all the cells are filled.

Useful info.

Each line will contain the theme-word which can be seen in the list on the right

with the number five in brackets(5):

This means that there are five instances of the word that need to be used(one for each "active" grey row on the grid):

and is a useful way of checking whether you have used that same word on each line.

Each of the other words can only be used once, unless it has a number against it, which means

that it must be used for that exact number of times.

If you see that you have dragged an element to the wrong place, just drag and drop it into the bin

at the top of the page.

When you think you have finished, check the results with each word in the list on the right

to make sure you've used every word the exact number of times.

This result of ts game can easily be verified by you by comparing the words in the finished grid with those on the right.

show less

After finishing the exercise, get immediate access  to the Audio Visual Lab.


------------------------------------------------------

Lesson 34

       Game 5. FREEMEE 7:        Instr VIDEO

Instructions:
show more


The Situation

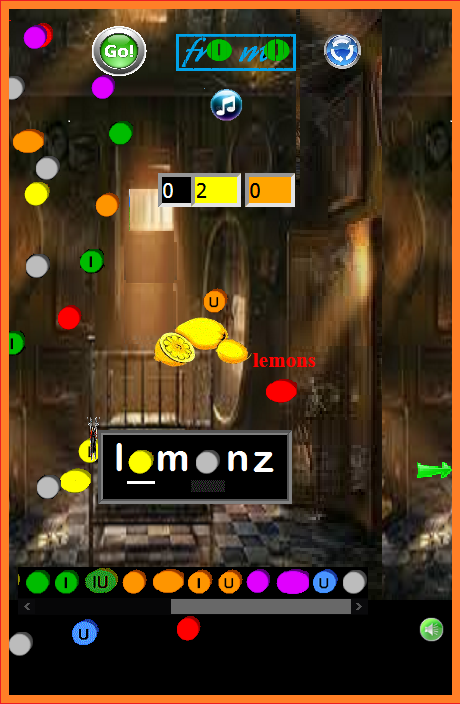
A host of sleeping bugs have been awoken by the intrusion of a solitary butterfly

that has unintentionally

wandered into their dark dungeon.

They don't take kindly to their new intruder but are undecided about how to get rid of her.

Soon she will run out of energy and will have to find somewhere to land and rest,

which would be fatal for her. So she must find a solution as soon as possible.

There is an open window somewhere in the room, but because of their harassment she cannot find it.

There is just one possibility - that someone comes to her rescue and eliminate the bugs one by one!

Note:

The scene may look a bit daunting at first glance, but the "mission" is made much easier

by the fact that the words that need to be constructed in FREEMEE are the exact words that

you encountered in VOCAB 1 (Game 1). This is a good opportunity to re-inforce your vocabulary from that game.

The Objecptive: - Release the imprisoned butterfly.

Instructions:

1)Press on icon "Go" to start.

2)Click on the center image to hear it's audio file.

3)From the slide menu at the bottom of the page, choose the Fon that corresponds to

the first vowel-sound that belongs in the first empty space in the Wordbox.

4)Continue until all empty spaces are filled. Notice that 1 point is added to the yellow counter

every time a Fon is placed correctly.

5)After each coloured Fon falls into the Wordbox, it's role of terminator must be activated(Click on it)

so that it's identical flying clone(there may be more than one) can be eliminated from the scene.

This results in automatically adding 1 point to the count in the orange box. When done,

and before moving on, make sure that both counters(yellow and blue), are equal in value.

Attention! If the totals at the end of the game are unequal,

it means that there are still flying Fons moving around, so missio has failed,

and you will be directed to start the game over again.


Note!

You may have noticed the dark grey "ghost" bars under each Fon as it replaces

the empty spaces in the Wordbox.

One of them hides the white accent-bar, and must be tapped to expose it.

This accent-bar represents the stressed Fon that is so important for correct pronunciation.

You must listen carefully before choosing the right one:

wrong guesses will detract 1 point in the black counter box.


6)Tap on the green arrow to take you to the next word.

7)On arriving on the final page, if all is well, an orange window-message will appear -

follow these instructions carefully.


Some details:

a) The butterfly will only be freed after ALL FlyFons are eliminated.

b) The slide menu exposes the whole range of the Fons menu bar when dragged from right to left

and vice versa.

c) The order of replacing empty spaces with Fons(step 3) in the Wordbox is up to you to decide.

d) To listen to any individual Fon sound, just use the small icon on the bottom right of the page

to open up the Fon slide menu.

Terminology

"Fons"

Refers to the collective name of all the coloured phonetic symbols,

and are present in their entirety in the Fons slide menu.

"FlyFons" These are Fons(the "bad" guys) that are constantly hovering(flying)

inside the perimeter of the present page and are actively giving chase to our hero.

"Cons"

The Colorfon Consonants (in white) that we use to constuct words in the Wordbox.

Remember that they are phonetic versions of our alphabet consonants and

sometimes differ from the traditional spelling.

"Wordbox"

This grey-bordered container is where we place our chosen Fons

from the slide menu, to constuct the Colorfon words.

"Accents"

You may have already noticed the white underline in ColorfonText words from previous exercise -

this is the accent-bar and serves as an anchor,

giving greater intensity to one syllable rather than an other:

without accents in speech, we would all be talking like robots!

show less

After finishing the exercise, get immediate access  to the Audio Visual Lab.


------------------------------------------------------

Lesson 35

       Game 6. KUASSONG 7:       Instr VIDEO

Instructions:
show more


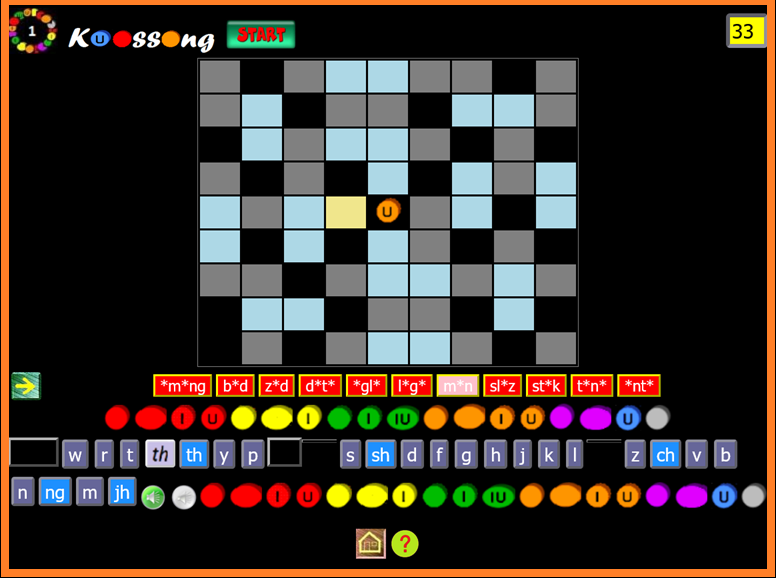
The Objecptive: Cell-Color

Black cells are for the Fons; grey cells are for the Cons and light-blue cells are blank cells

(not to be filled).

1. Starting Cells.

Any new word starting from a highlighted yellow cell MUST attach itself

to another occupied cell on the grid, if it not already attached

2. Directions.

In general, the direction(across or down) of a new word is evident, but not always.

Because of this, it is possible that the word you have chosen won't change color,

the reason being that the correct direction from the starting cell should be ACROSS instead of DOWN: or vice-versa:

Click on the directional arrow(on the left side) to change the horizontal word menu bar.

3. Yellow cells.

Always remember to fill the 1st cell each time a new word begins,

EVEN IF ALREADY FILLED!

Leaving yellow cells highlighted will cause confusion later and lead to unecessary errors.

See point 6 to deal with this eventuallity.

4. Last cell.

The same reasoning applies to the last letter in any word;

in this case the 1st cell of the next word won't highlight

and so prevent you from going further.

5. Last move.

You cannot "go back" on your last move, or retrace your previoius steps,

but you can correct a forgotten yellow cell.

6. Correcting a forgotten yellow cell:

(a)choose the word in the slide menu which begins in the highlighted yellow cell.

(b)once selected, grey-in the cell by activating the relevant letter from the keyboard.

7. "w" and "y.

""w" can begin a word but can never end it: same for "y".

8. Points.

The scoreboard situated on the top right of the grid only subtracts points

for choosing incorrect Fons.

Mistaken clicks on Cons or on words or on any other objects will not be counted as errors.

9. Accents.

The lines that are evident in some of the cells are there to indicate the 'stress'

on a particular sylable.

To avoid confusion, only horizontal accents should be considered. show less

After finishing the exercise, get immediate access  to the Audio Visual Lab.


------------------------------------------------------


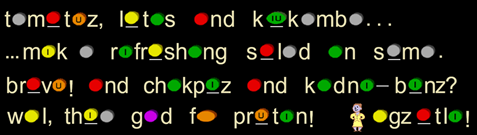
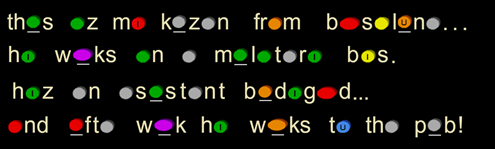
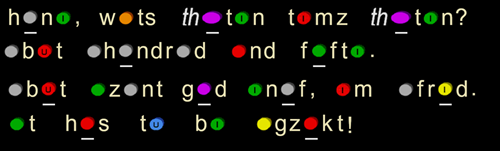
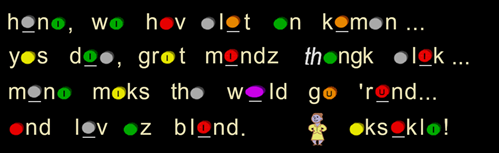
Here are the images from the Audio Studio for this week, images 1 to 6:-

just click on the link, and save to your downloads folder.

1.BB 7 2.VOCAB 7 3.DRAGONDROP 7 4.DIALOGUES 7 5.FREEMEE 7 6.KUASSONG 7

------------------------------------------------------


indexPage         Contact, Acknowledgements and Copyright Notices


colorfon2018